![Halda Logo Black Tight-2.svg]](https://info.halda.ai/hubfs/Halda%20Logo%20Black%20Tight-2.svg)
Your AI Form builder makes it easy to create, customize, and manage forms that engage prospective students at the right moment.
Follow this guide to create a new form and configure its design, questions, and response settings.
Creating a New Form
To get started, navigate to your school’s homepage in the Halda app.
From there, access AI Forms by either:
-
Clicking AI Forms in the left-hand navigation, or
-
Selecting the menu in the top-right corner and choosing AI Forms
This page stores all forms associated with your institution. You can select any existing form to edit it.
To create a new form, click Create New Form in the top-right corner.
You’ll be prompted to choose how you’d like to begin:
Start from a Template
Templates include pre-built questions and answer options.
You can preview each template to determine whether it fits your use case.
Start from Scratch
If none of the templates meet your needs, select From Scratch.
After selecting your starting point, you’ll:
-
Name your form
-
Optionally describe to the AI what you want the form to accomplish
If you provide a description, the AI will generate suggested questions and answer choices based on your input. You may also leave this blank and build the form entirely on your own.
Once created, you’ll enter the Form Workspace, where you’ll see one default Variant already created. A Variant represents a version of your form.
Managing Variants
To edit a Variant, click Edit to enter the form editing page.
If you’d like to make changes without affecting the original version, you can duplicate a Variant:
-
Click the three-dot menu to the right of the Variant
-
Select Duplicate
This will create a copy labeled “Variant A (Copy)”.
You can also duplicate a Variant to a different form:
-
Click the three-dot menu
-
Select Duplicate to Form
-
Choose the destination form
Note: The destination form must already exist before you can duplicate a Variant into it.
Branding and Design
The Branding and Design section controls how your form appears to visitors.
Billboard Layout
The Billboard is the visual header section of your form. You can configure how it displays on desktop and mobile.
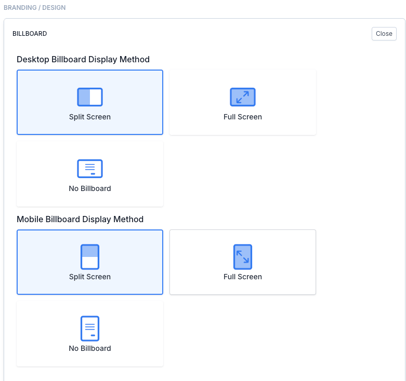
Available layout options:
-
Split Screen – Displays the billboard alongside the form questions
-
Full Screen – Displays the billboard first, followed by a button to begin the form
-
No Billboard – Displays only the form questions
Heading and Subheading
-
Heading Text is the primary message shown on the billboard.
-
Subheading Text appears directly beneath it.
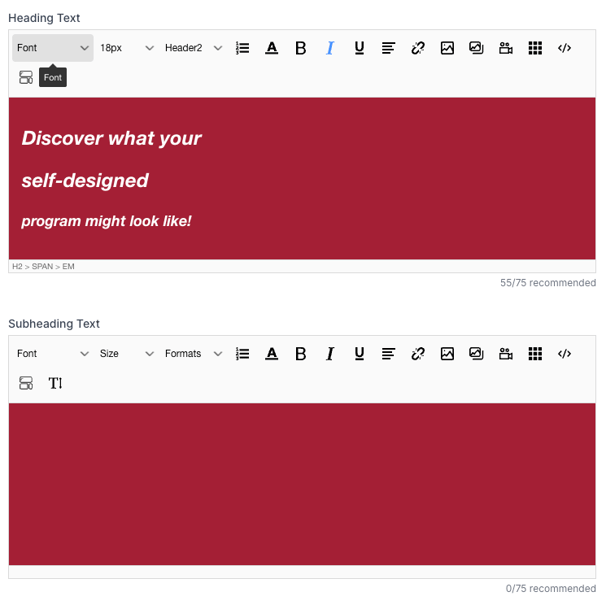
For both, you can adjust:
-
Font size
-
Text color
-
Alignment
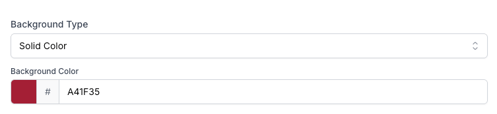
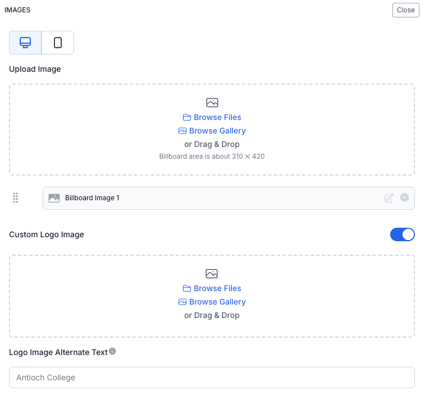
Background and Images
-
Set the billboard background color using a hexadecimal color code.
-
Upload an image to display within the billboard.
-
Adjust image placement and size directly in the live preview.
-
Upload a custom logo to replace the default logo if desired.
Navigation Settings
In the Navigation section, you can customize the button that advances the form.
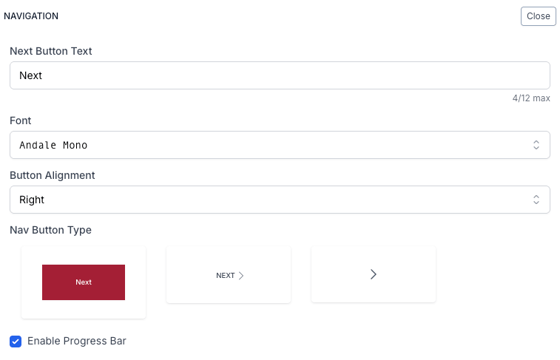
You can edit:
-
Button text (default is “Next”)
-
Font style and alignment
-
Button appearance
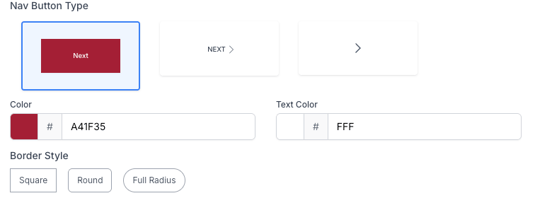
Button styles include:
-
Colored box
-
Plain text
-
Simple arrow
If using the colored box option, you can customize:
-
Background color
-
Text color
-
Button shape
You may also enable a progress bar to appear at the top of the form.
Managing Questions
You can add, remove, or rearrange questions at any time while editing.
To delete a question:
-
Click the minus icon next to the question
-
Confirm deletion
To rearrange questions:
-
Click and drag the circle icon to the left of a question
To add a new question:
-
Select Add Question at the bottom of the section
You can either:
-
Import a question from the Question Library
-
Create a new question manually
For a further in depth overview of the questions section, visit the AI Forms questions article.
Response Page
The Response Page determines what users see after completing the form.
You can choose to:
-
Enable a fully AI-generated response
-
Create static responses tied to specific answers
-
Add a custom CTA paragraph and button at the bottom
For a more in depth overview of of the response page visit the response page article.
AI Hub Configuration
If your institution uses AI Hub, you can customize how the form appears within that environment.
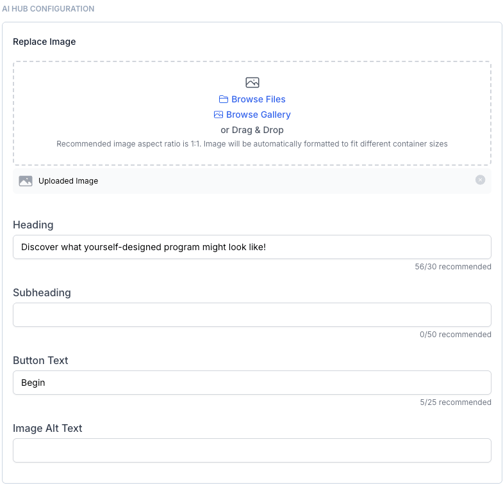
Editable elements include:
-
Heading
-
Subheading
-
Button text
-
Image
-
Image alt text
This ensures your form aligns seamlessly with your AI Hub experience.
Just like that, your AI Form is ready to be customized, tested, and published.
Need help building your first form or optimizing a Variant? Reach out to your Account Manager for guidance and best practices.